
Mi Digital Udyojak Technology Planning a Successful Software Development Release?

Planning a Successful Software Development Release?

Launching a new software version or product is one of the most crucial milestones in a project’s lifecycle. Whether you are updating an existing system or unveiling an entirely new solution, a well-structured Software Development Release plan ensures stability, performance, and user satisfaction. Poor planning can result in bugs, downtime, and dissatisfied users, but a well-organized release strategy can streamline delivery and build trust among stakeholders.

This comprehensive guide explores every stage of planning a successful Software Development Release, from setting objectives to post-release monitoring. Designed for both developers and non-technical project managers, this article breaks down complex processes into clear, actionable steps that ensure a seamless deployment.


Understanding the Importance of a Software Development Release

A Software Development Release is more than just delivering code—it’s the culmination of planning, testing, and collaboration across teams. It represents the point where development meets real-world use. Each release reflects your team's efficiency, attention to detail, and commitment to delivering quality.

Without a structured release plan, even the most innovative software can fail. Downtime, data loss, and usability issues can arise, affecting credibility and user trust. A planned release, however, minimizes these risks by aligning goals, timelines, and quality expectations.

A successful release ensures:

  • Stable and secure deployment

  • Smooth user transition

  • Predictable project timelines

  • Continuous feedback and improvement cycles


Defining Goals and Scope

Before diving into execution, you must define what success looks like. The foundation of any Software Development Release lies in clear, measurable goals. Determine whether your release focuses on fixing bugs, introducing features, enhancing performance, or integrating new technologies.

Set goals that are:

  • Specific: Identify what exactly the release will achieve.

  • Measurable: Define how you’ll assess progress (e.g., fewer bugs, faster load times).

  • Achievable: Ensure goals are realistic given available resources.

  • Relevant: Align with the company’s broader objectives.

  • Time-bound: Set a timeline that includes milestones and deadlines.

Equally important is defining the release scope. Decide which features or fixes will be included. Avoid scope creep—adding unplanned items can cause delays and compromise quality.


Building a Reliable Release Team

Behind every smooth Software Development Release is a strong team with clearly defined roles. Coordination and accountability are essential.

A typical release team includes:

  • Project Manager: Oversees planning, schedules, and coordination.

  • Developers: Implement and refine code changes.

  • Testers/QA Engineers: Validate software functionality and stability.

  • DevOps Engineers: Handle automation, deployment, and environment management.

  • Product Owners: Prioritize features and manage requirements.

  • Support Staff: Prepare documentation and assist users post-launch.

Encourage open communication within the team. Regular stand-ups, sprint reviews, and collaborative tools like Jira or Trello help maintain transparency.


Choosing the Right Release Strategy

The release strategy determines how updates reach users. Depending on project complexity, you can choose between several Software Development Release strategies.

1. Big Bang Release:

All changes are deployed simultaneously. While this can be efficient for smaller projects, it carries higher risks if bugs appear after deployment.

2. Phased Release:

Updates are rolled out gradually to different user groups. This minimizes impact and allows quick rollback if issues arise.

3. Continuous Delivery:

Changes are deployed automatically after successful tests. This approach supports rapid updates but requires robust automation pipelines.

4. Feature Toggles:

New features are hidden behind toggles, allowing selective activation. It helps teams test in production without disrupting users.

Selecting the right strategy depends on your team’s capabilities, infrastructure, and project requirements.


Setting Up the Release Environment

A controlled environment ensures that the Software Development Release mirrors production conditions. Proper setup avoids deployment issues and performance inconsistencies.

Key environments include:

  • Development: Where new code is written and initially tested.

  • Staging: A replica of production used for final validation.

  • Production: The live environment where users interact with the software.

Ensure environment consistency through automation tools like Docker or Kubernetes. Configuration management systems such as Ansible or Terraform can maintain identical setups across environments.


Effective Version Control and Branching

Version control systems like Git are vital for managing code changes efficiently. They provide visibility into code history and allow multiple developers to work simultaneously.

Recommended branching strategies include:

  • Main Branch (Main/Master): Always holds stable, deployable code.

  • Develop Branch: Integrates features before release.

  • Feature Branches: Used for individual features or bug fixes.

  • Release Branch: Final preparation before deployment.

  • Hotfix Branch: Urgent fixes applied directly to production.

Following a disciplined branching model prevents confusion, reduces merge conflicts, and ensures that the release process flows smoothly.


Testing: The Backbone of a Reliable Release

Testing ensures that your Software Development Release meets quality standards and behaves as expected. Skipping or rushing this step often leads to serious post-launch issues.

Comprehensive testing involves multiple layers:

  • Unit Testing: Validates individual components.

  • Integration Testing: Checks if modules work together properly.

  • System Testing: Evaluates the complete application environment.

  • Performance Testing: Measures speed, scalability, and reliability.

  • User Acceptance Testing (UAT): Confirms that software meets user expectations.

Automated testing can speed up repetitive tasks, but manual testing remains essential for usability and interface evaluation.


Release Documentation

Thorough documentation supports both developers and end users. A successful Software Development Release requires transparent, detailed release notes that explain what’s new, fixed, or deprecated.

Your documentation should include:

  • Version details and build numbers

  • Change logs and new features

  • Known issues and limitations

  • Installation or upgrade instructions

  • Rollback steps in case of failure

Clear documentation reduces confusion, improves communication, and facilitates smoother handovers between teams.


Pre-Release Activities

Preparation is the key to avoiding surprises during launch. Before deploying your Software Development Release, complete these crucial tasks:

  • Code Freeze: Prevent new changes that could destabilize the build.

  • Regression Testing: Verify that existing functionality isn’t broken.

  • Backup and Recovery Plan: Prepare backups of data and configurations.

  • Performance Checks: Ensure optimal speed and resource utilization.

  • Security Validation: Identify and fix vulnerabilities before deployment.

Pre-release validation gives confidence that the software is ready for users.


Deployment and Release Execution

When it’s time to go live, follow a structured deployment checklist to avoid errors. Automating deployments reduces the risk of human mistakes.

Typical steps include:

  1. Validate build integrity.

  2. Confirm environment configurations.

  3. Deploy code to servers.

  4. Run post-deployment tests.

  5. Announce release to users or internal teams.

Use continuous integration/continuous deployment (CI/CD) tools like Jenkins, GitHub Actions, or GitLab CI to automate release pipelines. These tools support frequent and reliable updates without downtime.


Monitoring After Release

Once your Software Development Release is live, monitoring begins immediately. Even well-tested systems can behave differently in production environments.

Monitor these key areas:

  • Performance Metrics: Response times, server load, and uptime.

  • Error Logs: Identify recurring issues or unexpected behaviors.

  • User Feedback: Gather insights from real-world usage.

  • Security Alerts: Detect threats and unauthorized access attempts.

Real-time monitoring tools such as New Relic, Datadog, or Prometheus can help teams quickly detect and resolve issues before they affect users.


Managing Rollback and Recovery

Despite the best preparation, things can go wrong. Having a rollback strategy ensures you can revert to a stable version quickly.

A rollback plan should specify:

  • Conditions that trigger rollback.

  • Steps for restoring databases or configurations.

  • Communication protocol for notifying stakeholders.

Regularly test your rollback procedures to ensure readiness in emergencies.


Gathering and Analyzing Feedback

Post-release feedback helps improve future iterations. Encourage users, testers, and support teams to share observations about performance and usability.

Collect feedback through:

  • Surveys and in-app prompts

  • Bug tracking systems

  • Support tickets

  • Analytics dashboards

Analyze patterns in user behavior and error reports. This data will guide enhancements for the next Software Development Release.


Continuous Improvement and Future Planning

A successful release isn’t the end—it’s part of a continuous improvement cycle. After analyzing results, plan for optimizations and new features.

Implement retrospectives with your team to identify what worked well and what didn’t. Create a knowledge base to document lessons learned. These insights ensure each Software Development Release is more efficient than the last.

Adopt agile methodologies to facilitate frequent iterations and incremental enhancements. Continuous improvement fosters innovation while maintaining system stability.


Common Challenges and How to Overcome Them

1. Last-Minute Scope Changes:

Avoid adding new features late in the process. Maintain strict change control to keep timelines intact.

2. Poor Communication:

Regular status updates and clear documentation prevent misunderstandings between teams.

3. Insufficient Testing:

Skipping tests to meet deadlines often causes critical post-release issues. Always prioritize quality assurance.

4. Deployment Failures:

Automate wherever possible and validate deployment scripts thoroughly.

5. Lack of Monitoring:

Continuous monitoring helps catch problems early and maintain user satisfaction.

Anticipating these challenges reduces risk and increases the success rate of your release.


Tools and Technologies for a Smooth Release

Leverage the right tools to streamline your Software Development Release process:

  • Version Control: Git, Bitbucket

  • CI/CD Automation: Jenkins, GitHub Actions, GitLab CI

  • Testing Frameworks: Selenium, JUnit, Cypress

  • Monitoring Tools: Datadog, Prometheus, New Relic

  • Project Management: Jira, Trello, Asana

These tools promote consistency, efficiency, and visibility throughout the development lifecycle.


Security Considerations During Release

Security should never be an afterthought. A secure Software Development Release protects both the company and users from potential breaches.

Key steps include:

  • Conduct code reviews for vulnerabilities.

  • Implement encryption for data transmission.

  • Validate authentication and authorization controls.

  • Use secure APIs and follow best practices for token management.

  • Regularly update dependencies to eliminate known exploits.

Incorporating security early prevents costly post-release fixes.


Documentation and Training for Users

User satisfaction depends on how well they can adapt to new features. Providing proper training and documentation simplifies adoption.

Offer:

  • User manuals and video tutorials

  • FAQs and support articles

  • Webinars or onboarding sessions

Clear instructions reduce support tickets and improve overall experience after a Software Development Release.


Measuring Release Success

To evaluate effectiveness, define KPIs (Key Performance Indicators) before deployment. Common metrics include:

  • Number of bugs reported post-release

  • User satisfaction scores

  • System uptime and reliability

  • Performance improvements

  • Adoption rates of new features

Analyzing these metrics provides a data-driven understanding of the release’s impact.


Final Review and Continuous Feedback Loop

After all post-release evaluations, compile your findings into a comprehensive report. Discuss performance, user feedback, and challenges faced during the Software Development Release.

Use this feedback loop to refine processes, adjust timelines, and plan future releases with greater efficiency. Continuous learning ensures long-term software excellence.


Conclusion

Planning a Software Development Release is a meticulous yet rewarding process. It combines strategy, teamwork, testing, and continuous monitoring to deliver reliable, high-quality software. Every release cycle contributes to growth, innovation, and user satisfaction.

By defining clear goals, selecting the right release strategy, automating where possible, and prioritizing testing, organizations can minimize risks and maximize impact. Post-release feedback and monitoring further strengthen future cycles, turning each launch into a stepping stone toward perfection.

Success in software development isn’t about speed—it’s about delivering dependable value that users can trust. When done right, every Software Development Release becomes a testament to your team’s professionalism, vision, and commitment to excellence.
Leave a Reply

Your email address will not be published. Required fields are marked *

Related Post

How To Find Free Logos With Vectorseek Search?How To Find Free Logos With Vectorseek Search?

Imagine you’ve just started a new project – perhaps a school club, a side hustle, or maybe you’re redesigning your personal blog. You know you need a strong logo, something clean, professional-looking. But graphic designers cost money, and stock logo packs don’t always hit the exact aesthetic you’re after. What if you could access hundreds or thousands of brand-quality logos—completely free, in editable high-quality formats? Enter VectorSeek, your secret weapon.

VectorSeek is a growing online portal that offers ready-to-use vector logos—think SVG, AI, EPS formats—that you can download and incorporate into your project right away. They’ve catalogued thousands of logos spanning categories from tech and fashion to sports and film. You might be asking: “Is this really free? Are the files usable? What’s the catch?” Good questions—and this guide will walk you through everything you need to know: how to search, how to download, legal considerations, best practices, and clever tips to maximize the resource.

By the end of this guide, you’ll feel comfortable navigating VectorSeek, finding the perfect logo vector for your purpose, downloading it and customizing it. You’ll save time, money, and maybe even stress. Whether you’re working on a presentation, a website, a printed flyer, or just need a placeholder for your brand–this is a tool that can elevate your visual game.


What is VectorSeek?

Definition and Purpose

VectorSeek is an online portal dedicated to providing downloadable vector-format logos—from famous brands, organizations, and more—to designers, hobbyists, marketers, and anyone else needing high-quality logos. According to the site, you can browse thousands of iconic brand logos “available in versatile formats like SVG, EPS, AI, and PNG.”

What that means in simpler terms: if you need a logo file that scales cleanly (that is, no pixelation when you enlarge it), VectorSeek lets you download it. Vector formats (SVG, AI, EPS) are ideal for print, web, and heavy editing.

Why It’s Useful

  • Speed: You don’t have to design a logo from scratch (unless you want to).

  • Quality: The files offered are high resolution and vector‐based.

  • Variety: Covers many categories—technology, apparel, health, entertainment, etc.

  • Free access: At least for the downloads, many are labelled free (though with usage caveats).

  • Editable formats: Being vector means you can open them in design software (Illustrator, Inkscape, etc) and tweak colours or elements if you like.

Some Caveats

  • Free doesn’t always mean “free for all uses.” Many logos listed are from trademarked brands, and the site warns about usage rights.

  • Because the content is pre-made, you might find many users using the same logo file (so uniqueness is not guaranteed).

  • Editing vector files requires some knowledge of graphics software (or willingness to learn).

Summary

In short: VectorSeek is a powerful resource for anyone needing logos quickly in vector form, especially when budget or time is limited. That said, you need to use it wisely — understand what you’re doing and ensure compliance with usage rights.


How to Search Effectively on VectorSeek

Finding what you need in VectorSeek is straightforward—but using some smart strategies makes the process faster and more accurate. Below is a step-by-step approach.

Step 1: Visit the site and browse categories

When you go to the site, you’ll see categories like “Technology”, “Fashion”, “Health”, “Educational”, etc. This is a good starting point if you’re exploring or don’t yet know the exact brand/logo you need.

Step 2: Use the search bar

If you already have a brand name, keyword, or category in mind—type into the search bar. For example: “YouTube logo” or “Apple logo SVG”. The site will show pages with results.

Step 3: Filter by file type / format

Look for file types like SVG, AI, EPS, and PNG. If you plan to edit the logo, choose a vector format (SVG, AI or EPS) over raster (PNG). For example, VectorSeek offers the “R Logo Vector” in PNG, SVG, AI, EPS formats. 

Step 4: Examine the preview / quality

Click on the logo result – check the resolution, the preview, and whether it’s a clean vector (openable in Illustrator or Inkscape). Good logos will have crisp lines, no blurring when zoomed, and ideally come in a .zip containing all formats.

Step 5: Review usage rights

Before downloading, check any “License” or “Terms of Use” note. For example, the “ChatGPT logo” listing on VectorSeek states “License: Not For Commercial Use.” Make sure you’re clear whether you intend to use the logo for personal, educational or commercial purposes, and whether that usage is permitted.

Step 6: Download the file

Once you’ve found the logo and confirmed format and licensing, click download. Many files come bundled in .zip; keep them organized in a folder so you don’t lose track of which file is which.

Step 7: Use & adapt the logo

Open the vector file in your design program; make any adjustments you need (colour, size, typography). Export the logo in the format(s) your project requires (web, print, etc).


Choosing the Right Logo Vector: What to Look For

Now that you know how to search, let’s talk about how to choose the right vector file. A good vector logo asset is more than just “looks cool”—it needs to meet technical and legal criteria.

Format / File Type

  • SVG (Scalable Vector Graphic) – great for web, interfaces, easy editing.

  • AI (Adobe Illustrator) – best for professional editing, printing, full control.

  • EPS (Encapsulated PostScript) – good for print workflows, legacy design systems.

  • PNG – raster image. Useful for web or quick uses, but less flexible.

    VectorSeek offers all of the above in many cases. 

Resolution & Scaling

Even though vector files scale indefinitely, make sure the source is clean: no weird artefacts, broken paths, missing pieces. Try zooming in once downloaded to test quality.

Accuracy & Authenticity

Is the logo true to the official brand version (if you are using an existing brand logo)? Some free downloads might be outdated or low quality. VectorSeek claims to refine and curate logos to ensure high quality.

Licensing / Usage Rights

This is critical. Many logos from major brands are trademarked, copyrighted, or have restrictions. VectorSeek’s “About” page states: “You hereby agree … that the artwork you download will be used for non‐commercial use without infringing…” in some cases. 

Thus ask yourself:

  • Is my usage commercial (selling something, part of a business)?

  • Do I need that brand’s permission?

  • Do I need to give attribution?

  • Are there restrictions on editing / altering?

If you’re unsure, treat it as for educational/personal use only unless you confirm rights.

Relevance & Style Fit

Make sure the logo fits your project. It matches your colour scheme? It reflects the tone (playful vs formal)? If you’ll edit it, how easy will it be to colour‐match or adapt the typography?

Organizational / File Structure

When you download, keep assets organized. Use folders like: BrandName_VectorSeek_SVG, etc. That way you avoid confusion later.


How to Download and Use Free Logo Vectors on VectorSeek

Here’s a practical walkthrough: from landing on the site to final use in your project.

Step-by-Step Guide

  1. Open your web browser and go to vectorseek.com (i.e., VectorSeek).

  2. On the homepage you may see featured categories or recent logos. Use search bar or category navigation.

  3. Suppose you search for “YouTube logo SVG”. You land on a results page.

  4. Click on the listing. Check the page for: formats offered (PNG, SVG, AI), a preview image, any download button, and note the license or usage terms.

  5. If acceptable, click the “Download .zip” or “Download vector logo” button. The site will (in many cases) package the vector file(s) into a zip file.

  6. Once downloaded, unzip it into a folder. You’ll likely see multiple files: e.g., logo.svg, logo.ai, logo.png.

  7. Open your vector editing software (such as Adobe Illustrator, Inkscape, or even a web-based system).

  8. Edit if desired: change colours to match your brand, remove or add elements, resize appropriately.

  9. Export the final version(s) you need: maybe a web-friendly PNG (72 dpi), and a print-ready PDF or EPS (300 dpi or vector).

  10. Insert into your project: website, flyer, presentation, social media. Ensure you’re using correct size, clear space around the logo, and maintain quality.

  11. If license requires attribution, include a citation (e.g., “Logo courtesy of Brand X via VectorSeek”).

Common Use Cases

  • Creating a mockup for a startup or business idea.

  • Designing presentation slides where you show brand partnerships.

  • Designing classroom materials or student projects where brand logos are illustrative.

  • Web design prototypes where you incorporate known brand elements.

  • Non-profit or internal business material (with proper right clearance) which uses logos as part of design elements.

Quick Tips for Better Results

  • Always keep the original vector file untouched; create a “working copy” to edit. That way you can revert if something goes wrong.

  • When you change colour or typography, maintain readability and clarity. Vector logos often rely on simple shapes; over‐editing can ruin that.

  • For print, convert text to outlines (in Illustrator) and embed all fonts, or better still use vector paths so your print is flawless.

  • For web use, export a 1× size and optionally a 2× (for retina screens) PNG or WebP.

  • Keep a “master folder” of all your downloaded logos from VectorSeek with a simple naming convention so you can reuse them later.


Legal & Ethical Considerations

Using free logos is convenient—but if you skip the legal checks, you might land in trouble. Here are what you must consider.

Trademark, Copyright and Brand Logos

Most logos you find for major brands are trademarked. That means that while you may access the vector file, you do not necessarily have the right to use it in any way you like. Some key points:

  • Even if a logo is downloadable, you may need permission from the brand owner for commercial use.

  • Downloading a logo for personal or educational use might be acceptable—but usage “in-commerce” (selling something, branding a new product) often triggers restrictions.

    VectorSeek’s listing on BrandsOfTheWorld states: “…you agree … that the artwork … will be used for non-commercial use without infringing on the rights of the copyright and/or trademark holder only.” 

Licensing Terms on VectorSeek

When you click a logo listing on VectorSeek, check for a “License” section. Some logos are explicitly marked “Not For Commercial Use.” For example: the ChatGPT logo listing says exactly that. 

Therefore:

  • If your project is commercial (e.g., your business website, paid marketing), you should assume you cannot freely use every logo without brand permission.

  • If your project is personal, student, internal or prototype, you are probably safer—but still check if the brand prohibits any type of use.

  • If you edit or alter a brand’s logo substantially, you might infringe on brand identity rights (even if the vector was obtained).

Attribution and Usage Formalities

Some logos may require giving credit (attribution) to the source or brand when used. Others might restrict derivative works.

Make sure to keep a record: date of download, source link, original file name, license terms at the time of download—just in case usage rights change in the future.

Good Practice: Use Responsibly

Even if material is “free download,” you’re still dealing with someone’s intellectual property. Some responsible guidelines:

  • Don’t claim you made a brand-logo if you didn’t.

  • Don’t repurpose logos in a way that suggests endorsement by the brand unless you have explicit permission.

  • Don’t sell the raw vector file as your own artwork.

  • If unsure, contact the brand or choose a logo truly under Creative Commons / public domain or create your own.


Tips, Tricks & Pitfalls When Using Free Logos from VectorSeek

Here are some best practices and things to watch out for to get the most value and avoid headaches.

Tip: Use Search Terms Broadly

If you search just the brand name (e.g. “Starbucks logo”), you may miss variations. Try terms like “Starbucks green logo vector”, “Starbucks SVG PNG AI”. On VectorSeek you’ll find multiple formats.

Similarly, if you’re not looking for a brand but a category (e.g. “fitness logos” or “education symbols”), try browsing the category sections.

Tip: Always Download Vector First

If the listing has both PNG and SVG/AI formats, always download the vector format. PNG is fine for quick web use but if you need to scale or edit, vector is far superior.

VectorSeek provides the vector formats: “…available in versatile formats like SVG, EPS, AI…” 

Trick: Version Control

When you download a logo, rename the folder or file with date and brand. For example: 2025-10-25_YouTube_Logo_VectorSeek.zip. This helps you track your assets over time.

Save a “clean original” copy and maintain a “working version” for your edits.

Pitfall: Assuming All Uses are Free

As discussed under legal considerations, don’t assume you can use a logo for anything just because it’s free to download. Many listings restrict commercial use.

Always verify the license as it may change even after you download. If you plan long term usage, keep a note of the screenshot of the license information at the time.

Tip: Customize for Uniqueness

If you are using the logo as a placeholder or for an internal project, you might want to tweak color, shape slightly, or pair it with your own typography so it fits your design—not just “grab and go”.

You could adjust colour palette to match your brand, add a drop shadow for digital use, or pair it with a tagline.

Pitfall: Using Outdated Logos

Brands sometimes update their logos. Ensure the version you download is current if your project requires up-to-date branding. VectorSeek has “Recent Logos” lists.

If you find a very old version, it may look outdated or even confuse your audience.

Tip: Organize for Project Use

If you are working on multiple projects, maintain folders e.g.:

/logos /clientA /vectorseek_brandname /clientB /unused_assets

Document the format, download date, license type inside a simple readme.txt.

Pitfall: Forgetting Colour Profiles

When using vector logos in print, ensure you convert colors to CMYK or use appropriate colour profiles. Failing to do so may result in weird print colours.

Similarly, for web use, export files with the correct dimensions and resolution.


Use Cases: Applying VectorSeek Logo Vectors in Real Projects

Let’s look at several practical scenarios and how you can apply assets from VectorSeek in each.

Scenario 1: Student Project / Presentation

Suppose you’re building a class presentation about social media platforms. You need the logos of major platforms (e.g., YouTube, Facebook, Instagram).

  • Use VectorSeek to search “YouTube logo SVG” or similar.

  • Download the vector.

  • Insert into slides; resize without quality loss.

  • Because it’s an educational project (non-commercial), usage risk is very low (but still attribute if required).

  • Benefit: Your slides look professional, crisp, and consistent.

Scenario 2: Mock‐up for a Startup Pitch

You’re creating a pitch deck for your new app and you want to show brand partnerships (or potential comparisons). You might use logos of brands to illustrate your market space.

  • Use VectorSeek to fetch the logos.

  • Customize the colour scheme to match your pitch deck aesthetic.

  • Make sure to clarify in your deck: “Logos used for illustration only, rights belong to respective owners.”

  • Because this is a “mock-up” and not final commercial branding, you’re in a safe zone. Still—avoid implying endorsement unless you have it.

Scenario 3: Internal Business Material

Your company is preparing an internal document (employee handbook) that lists partner brands.

  • Use vector logos to keep print quality high.

  • Possibly you can get partner permission or rely on fair internal use.

  • For annual reports or external publishings, check for commercial rights.

Scenario 4: Website or Blog Branding

You have a blog covering tech brands, and you want to include brand logos in posts.

  • Use VectorSeek to download high-quality vectors.

  • Resize for web (e.g., width 200px) and export as PNG for fast loading.

  • Add alt text and credit if needed.

  • Make sure usage rights allow editorial use. Most brand logos in editorial context are safe under „fair use“ but this is still context‐sensitive.

Scenario 5: Print Merchandise (Tshirt, Mug, etc)

This is where caution is highest. If you plan to print a logo on merchandise (shirts, hats, mugs) for sale, you often need permission from the trademark holder.

  • Even if you got the vector from VectorSeek for free, printing and selling might violate trademark law.

  • Option: Use the free logo as reference and design your own inspired version (with different colour, style) that does not infringe.

  • Consult legal if necessary.


Conclusion

In this guide we’ve walked you through everything you need to confidently use VectorSeek for finding free vector logos.

VectorSeek is a powerful resource of high-quality vector logos in formats like SVG, AI, EPS and PNG.Searching effectively (using brand names, categories, correct format) makes your workflow faster.Choosing the right vector means evaluating format, resolution, authenticity, licensing and style-fit.

Downloading and using the logo involves: locating it, verifying usage rights, editing if needed, exporting for your medium, and keeping track of the source.Legal and ethical considerations are critical: free download does not mean free for all uses, especially for commercial contexts.

Use cases show how you can apply these assets in student projects, internal materials, websites, pitch decks, and more-—but always adapt to the rights context.Best practices include version control, organisation, customizing for uniqueness, verifying colours and formats for print/web.

If you follow these steps and guidelines, you’ll be able to leverage VectorSeek’s assets effectively—save time, elevate your design, and avoid common traps.

By doing this hands-on, you’ll internalize the process and be ready whenever a new design need pops up.

Redefining Visual Storytelling The Ultimate AI Video Generator for Content CreatorsRedefining Visual Storytelling The Ultimate AI Video Generator for Content Creators

In an age where visual content reigns supreme, the demand for engaging videos has surged. Enter AI video generators, sophisticated tools that leverage artificial intelligence to create captivating videos swiftly and efficiently. Among the myriad of options available, pinpointing the best AI video generator can significantly elevate your content strategy.

Why Choose an AI Video Generator?

AI video generators automate the video-making process, allowing creators to focus on storytelling rather than technicalities. These platforms come equipped with advanced features such as voice synthesis, scene recognition, and customizable templates that cater to various content niches—including marketing, education, and entertainment. By utilizing these tools, creators can produce professional-quality videos in a fraction of the time it would take using traditional methods.

Top Features to Look For

When seeking the best AI video generator, consider several key features. Firstly, versatility in video style is crucial; the platform should support everything from animated clips to real-life footage. Secondly, ease of use is vital. Look for user-friendly interfaces that streamline the production process. Lastly, output quality cannot be overlooked—high-definition video output is essential for professional presentations.

Some standout options in the market include Pictory, Synthesia, and Lumen5. Each of these platforms offers unique capabilities tailored to different needs, enabling creators to find the perfect fit for their projects.

For those ready to explore the possibilities, consider checking out the best ai video generator available today. With the right tools, transforming your ideas into stunning visual stories has never been easier. Embrace the future of content creation and watch your engagement soar!

The Best Underwater Free PNG Fish Images?The Best Underwater Free PNG Fish Images?

In the digital world, high-quality visuals are crucial for any creative project. Whether you are designing a website, crafting a presentation, or creating a digital artwork, visuals can make your work stand out. Among the most fascinating subjects to use in design are underwater scenes, particularly images of fish. These vibrant creatures add life and movement to your project, capturing the beauty of aquatic life.

For designers, educators, and hobbyists, download png images of underwater fish is an excellent way to enhance visuals. PNG files are especially popular because they support transparent backgrounds, making it easy to overlay fish images onto any design without dealing with awkward edges or backgrounds.

Why Use PNG Images of Fish?

Clarity and Quality

One of the biggest advantages of PNG images is their high quality. Unlike JPEGs, PNGs do not lose detail when saved repeatedly. This is particularly important when working with intricate designs, like the delicate patterns on tropical fish. The crisp clarity of PNG files ensures that your visuals look professional and appealing.

Transparent Backgrounds

Another reason designers love PNGs is transparency. You can place a PNG fish image over any background, whether it's a coral reef illustration or a gradient design. This flexibility allows for endless creative possibilities, such as designing educational infographics or animated scenes for digital media.

Versatility Across Projects

PNG images are incredibly versatile. You can use them for:

  • Web design

  • Presentations

  • Social media graphics

  • Educational materials

  • Digital art projects

By downloading PNG images, you get the freedom to use the same resource across different projects without worrying about compatibility issues.

Where to Find Free Underwater PNG Fish Images

Finding quality free resources can be challenging. Fortunately, several platforms offer free, high-resolution PNG images of fish that you can legally use in your projects.

Pixabay

Pixabay is a popular source for free images. They offer a wide selection of underwater fish PNGs in high resolution. You can search for specific fish types, such as clownfish, angelfish, or seahorses, and download PNG images without any cost. The platform also allows commercial use without attribution, making it ideal for professional projects.

Pngtree

Pngtree specializes in PNG files. You can find thousands of underwater fish images with transparent backgrounds. They categorize images based on style, such as cartoonish, realistic, or minimalist, which makes searching for the perfect image much easier.

Freepik

Freepik provides high-quality graphics, including underwater PNG fish images. While some resources require attribution, there are plenty of free options available. Freepik also offers vector versions, which can be resized without losing quality, perfect for large-scale projects.

Unsplash

Though Unsplash is known for photography, some contributors provide PNG fish images with transparent backgrounds. You can download PNG images from Unsplash and use them directly in your creative projects.

Flaticon

For those seeking stylized or cartoon fish, Flaticon is an excellent option. Their PNG fish images are perfect for icons, infographics, or playful designs. Many icons are free with attribution, and premium options are available for users who want unlimited downloads.

Tips for Choosing the Best PNG Fish Images

Selecting the right fish images is just as important as finding them. Here are some tips to ensure your visuals have maximum impact:

Consider the Style

Think about the overall style of your project. Realistic fish images work well for educational content or nature-inspired designs. Cartoon-style fish are better suited for playful projects or games. Consistency in style ensures that your project looks polished.

Check Resolution

High-resolution images are essential for professional-looking designs. Avoid low-quality images that may appear pixelated when enlarged. Most free PNG resources provide high-resolution options, but always double-check before downloading.

Transparency Matters

Ensure the PNG has a transparent background if you plan to overlay it onto other designs. Some images may appear to have transparency but contain faint background edges. Testing the image in your design software helps avoid surprises.

Variety is Key

Using different fish species can make your underwater scene more engaging. Combine tropical fish, coral reef inhabitants, and exotic species for a lively composition. Variety adds depth and realism to your project.

Verify Licensing

Even free images may have usage restrictions. Always check licensing terms to ensure that you can use the PNG images for your intended purpose, whether personal or commercial.

Creative Uses for Underwater Fish PNGs

Underwater PNG fish images are incredibly versatile. Here are some creative ways to use them:

Digital Artwork

Artists can use PNG fish to create underwater illustrations or digital collages. Combining multiple fish species allows you to craft a vibrant, dynamic scene that captures the essence of ocean life.

Educational Materials

Teachers and educators can incorporate PNG fish images into presentations, worksheets, and learning games. Visual aids help students understand marine biology concepts and make learning more interactive.

Web Design

PNG fish images are perfect for web designers who want to add life to a website. Use fish graphics as icons, section dividers, or decorative elements to create a cohesive underwater theme.

Social Media Graphics

Social media posts benefit greatly from eye-catching visuals. Use PNG fish images to design posts for awareness campaigns, aquarium promotions, or creative content that engages followers.

Marketing Materials

Businesses in the aquatic industry, like aquariums or pet stores, can leverage PNG fish images for flyers, brochures, and digital advertisements. The clean, professional look of PNGs helps maintain a polished brand image.

How to Use PNG Fish Images in Design Software

Most design software supports PNG files. Here’s a simple guide for popular programs:

Adobe Photoshop

  1. Open your design file.

  2. Drag and drop the PNG fish image onto the canvas.

  3. Resize and position it using the transform tool.

  4. Use layers to overlay multiple fish or background elements.

  5. Save your final design in your preferred format.

Canva

  1. Upload the PNG fish image to your Canva account.

  2. Drag it into your project template.

  3. Adjust size, rotate, or flip the image as needed.

  4. Combine with other graphics, text, or icons for a complete design.

PowerPoint

  1. Insert the PNG image into your slide.

  2. Resize and move it to fit your content.

  3. Use layering options to place the fish behind or in front of text.

  4. Enhance slides with multiple fish to create depth and visual interest.

Common Mistakes to Avoid

Even with free PNG fish images, beginners often make mistakes. Here are some to watch out for:

Overcrowding

Adding too many fish images can clutter your design. Aim for balance by using fewer, high-quality images strategically.

Ignoring Color Harmony

Different fish images may have inconsistent lighting or color palettes. Adjust colors using software tools to maintain a cohesive look.

Neglecting File Size

High-resolution PNGs can be large, which may slow down web pages or presentations. Optimize images without sacrificing quality using compression tools.

Not Following Licensing Rules

Failing to respect licensing agreements can lead to legal issues. Always verify that your usage complies with the terms provided.

Best Practices for Organizing PNG Fish Collections

If you frequently download PNG images, organizing them efficiently saves time:

Create Folders by Category

Sort images into categories like tropical fish, deep-sea fish, or cartoon fish. This structure makes it easier to locate the right image quickly.

Use Descriptive File Names

Rename files with clear identifiers, such as "clownfish-transparent.png" instead of generic names like "image1.png." Descriptive names improve workflow efficiency.

Maintain a Reference Document

Keep a spreadsheet or document with details about each image, including source, license type, and usage notes. This helps track where each image came from and ensures compliance.

Trends in PNG Fish Design

The digital design industry constantly evolves, and PNG fish images are no exception. Here are current trends:

Minimalist Illustrations

Clean, simple designs with bold colors are popular in web and app design. Minimalist fish images make interfaces look modern and professional.

Realistic 3D Renders

High-quality 3D renders of fish with realistic lighting and shadows are increasingly used in digital art and marketing materials.

Animated PNGs

Some designers create animated PNGs (APNGs) to add movement to websites or apps. Swimming fish animations bring underwater scenes to life.

Customizable PNG Packs

Designers are producing packs of PNG fish with multiple poses, colors, and species. These packs allow for easy customization and faster workflow.

Conclusion

Underwater free PNG fish images are a valuable resource for anyone looking to enhance digital projects with vibrant, high-quality visuals. By understanding where to find the best PNG images, how to use them creatively, and how to organize your collection, you can elevate your designs to a professional level.

Remember to choose images with transparency, check resolution and licensing, and maintain visual harmony in your projects. Whether for educational materials, marketing campaigns, social media, or personal art, downloading PNG images of fish opens a world of creative possibilities.

Embracing these resources will help you create captivating underwater scenes that captivate viewers and showcase your design skills. The beauty of the ocean is at your fingertips, ready to be integrated seamlessly into your projects with free PNG fish images.

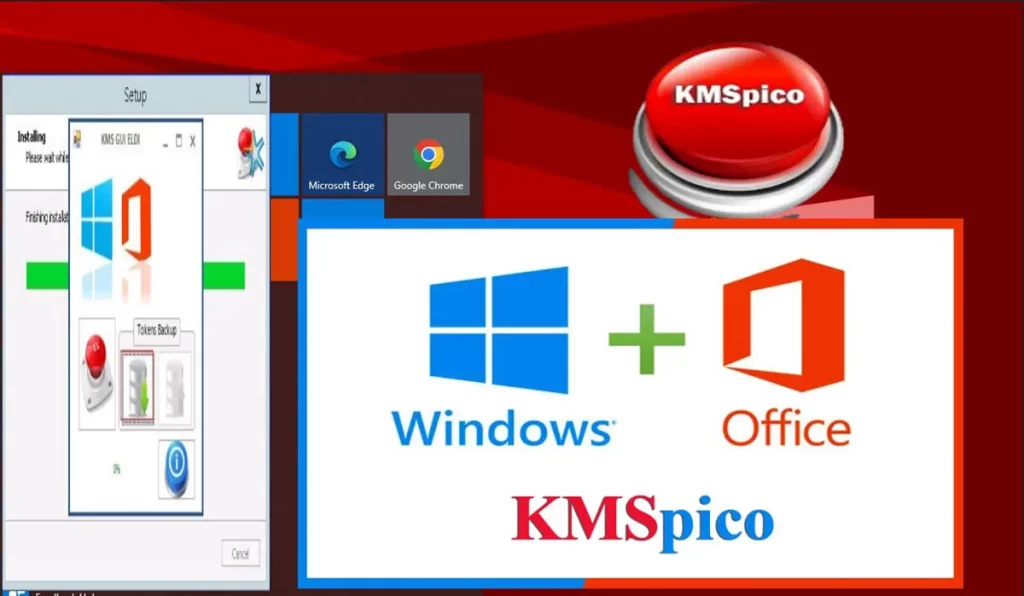
Everything You Need to Know About KMSPico Windows ActivatorEverything You Need to Know About KMSPico Windows Activator

In the modern digital era, having fully activated Windows and Microsoft Office is crucial for both work and personal use. Many users face challenges with license costs or complicated activation procedures that can slow down productivity. This is where kmspico download windows activate comes in, providing a reliable and easy solution for activating Windows and Office without additional expenses. KMSpico has become a popular choice among computer users worldwide because it effectively unlocks all features, allowing seamless access to tools essential for daily tasks. By visiting our website, you can safely download KMSpico and enjoy a fully functional system that enhances your efficiency.

Starting with kmspico download windows activate is simple and straightforward. First, ensure that you are downloading from the official website or a trusted source to avoid potential malware risks. Once on the download page, locate the correct link, usually at the top or bottom of the page. After downloading, you may need to temporarily disable Windows Defender or other antivirus software, as KMSpico requires access to certain system files to complete the activation process. By following the installation instructions, including running the file as an administrator and restarting your computer, you can activate Windows and Office quickly and safely. This process ensures you can start using your software immediately without any limitations.

KMSpico is compatible with multiple Windows versions, including Windows 7, 8, 10, and the latest Windows 11. For Windows 11, KMSpico 11.2.1 is recommended, specifically designed to work with the latest security updates. Installing this version is easy: download the software, run it as an administrator, follow the prompts, and restart your system. Once the reboot is complete, your Windows and Office programs are fully activated, giving you access to all premium features. The development team regularly updates KMSpico to maintain compatibility with new Windows updates, ensuring a long-term solution for activation needs.

Safety is an important factor when using kmspico download windows activate. Always download the software from trusted sources, and temporarily disable antivirus programs during installation only. After activation, these security measures can be re-enabled. Additionally, it is essential to download the version compatible with your Windows operating system, as using an incorrect version may prevent successful activation. Avoid running KMSpico unnecessarily after the initial activation to prevent disrupting the software’s functionality. By following these safety tips, users can enjoy a fully activated Windows system without compromising their computer’s security.

The convenience of kmspico download windows activate makes it highly appealing. Unlike other activation methods that require complex license keys or commands, KMSpico simplifies the process into a few easy steps. The software is lightweight, does not affect system performance, and can be removed after activation while retaining the activated status. This ease of use is particularly useful for students, professionals, and casual users who want an efficient way to activate their Windows and Office software without technical difficulties. By choosing KMSpico, users can enjoy immediate access to all features and improve overall productivity effortlessly.

In conclusion, kmspico download windows activate is a practical and cost-effective solution for anyone needing fully activated Windows and Microsoft Office. With careful adherence to the installation instructions, users can unlock premium features, improve system performance, and work efficiently without the hassle of expensive licenses. Our website provides a secure and reliable download source for KMSpico, ensuring a smooth and safe activation experience. Take control of your digital environment today and enhance your computing experience by visiting our site to download kmspico download .

Smart IPTV 4K : expérience visuelle et sonore immersive pour tous les utilisateursSmart IPTV 4K : expérience visuelle et sonore immersive pour tous les utilisateurs

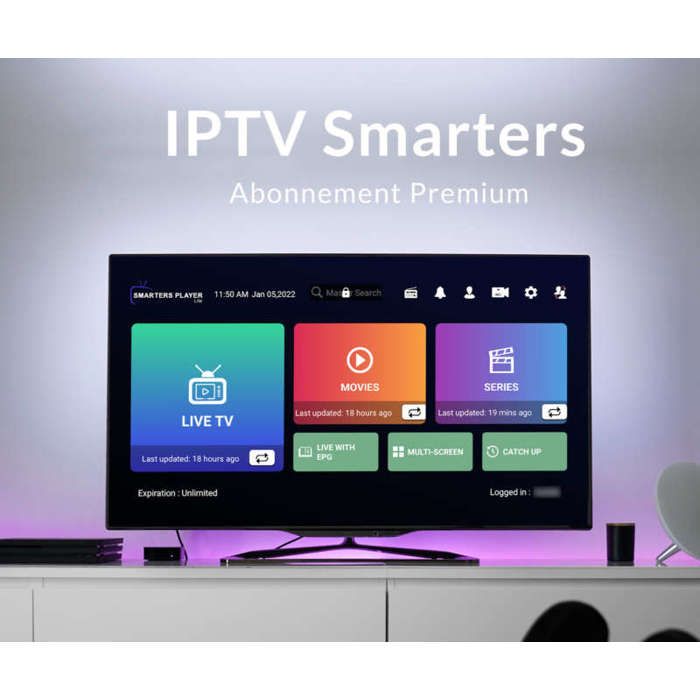
IPTV Smarters Pro est aujourd’hui considérée comme l’une des meilleures applications pour exploiter pleinement un abonnement IPTV moderne et performant. En 2026, la demande pour des solutions IPTV fiables ne cesse d’augmenter, notamment en France, où les utilisateurs recherchent un accès illimité à la TV en direct, aux films et aux séries, avec une qualité d’image irréprochable. Grâce à IPTV Smarters Pro, les abonnements IPTV 4K à partir de 13€ prennent tout leur sens, offrant une playlist impressionnante de plus de 50 000 chaînes en Full HD, HD, SD et 4K, ainsi qu’un vaste catalogue VOD regroupant les meilleurs films et séries du moment.

L’un des principaux atouts d’IPTV Smarters Pro réside dans sa capacité à garantir une diffusion fluide et stable, même lors des pics de connexion. Associée à un abonnement IPTV premium, l’application permet de regarder la TV en direct sans interruption, avec un uptime annoncé de 99,99 %. Que ce soit pour suivre des compétitions sportives, des chaînes internationales ou des programmes français, l’expérience reste constante et fiable. Un abonnement IPTV 4K bien optimisé transforme ainsi chaque session de visionnage en un moment de confort absolu, sans coupure ni ralentissement.

Avec un abonnement Smart IPTV 4K compatible avec IPTV Smarters Pro, la qualité d’image et de son atteint un niveau supérieur. Les contenus diffusés en UHD et 4K offrent une netteté exceptionnelle, des couleurs profondes et un contraste précis, permettant une immersion totale dans chaque programme. Les films et séries gagnent en réalisme, tandis que le son haute fidélité complète l’expérience en recréant une ambiance digne d’une salle de cinéma. Ce niveau de performance fait de l’abonnement IPTV France une solution idéale pour les utilisateurs exigeants à la recherche du meilleur abonnement IPTV 4K 2026.

IPTV Smarters Pro séduit également par sa compatibilité IPTV étendue, un critère essentiel pour les foyers modernes équipés de plusieurs appareils. L’application fonctionne parfaitement sur Smart TV, smartphones Android et iOS, tablettes, box Android, MAG Box et récepteurs Enigma2. Un seul abonnement IPTV suffit pour accéder à l’ensemble des chaînes et contenus VOD sur tous ces supports. Cette flexibilité permet de profiter de la TV en direct aussi bien depuis son salon que lors de déplacements, tout en conservant une qualité de streaming optimale.

La mise en service d’un abonnement IPTV avec IPTV Smarters Pro est simple et rapide, même pour les utilisateurs novices. Après avoir choisi un abonnement IPTV 4K, disponible en différentes durées allant de 1 à 12 mois, les identifiants ou le lien M3U sont transmis par email dans un délai généralement compris entre une et douze heures. Une fois les informations renseignées dans l’application IPTV Smarters Pro, l’accès à plus de 50 000 chaînes et à la VOD est immédiat. Cette simplicité d’installation contribue fortement à la popularité de l’application auprès du grand public.

Le meilleur iptv abonnement 4K en France se distingue par un excellent rapport qualité-prix, une stabilité constante et une offre de contenus extrêmement riche. À partir de 13€, les abonnements IPTV proposent un accès illimité à des chaînes internationales, françaises et sportives, ainsi qu’à une bibliothèque VOD régulièrement mise à jour. IPTV Smarters Pro optimise ces abonnements IPTV grâce à une interface fluide, une navigation intuitive et une gestion intelligente des flux vidéo. Cette combinaison permet aux utilisateurs de profiter d’un abonnement IPTV pas cher sans compromis sur la qualité ou la performance.

En conclusion, IPTV Smarters Pro s’impose comme une référence incontournable pour tous ceux qui souhaitent profiter d’un abonnement IPTV premium 4K en France en 2026. Grâce à sa compatibilité universelle, sa stabilité remarquable et sa capacité à sublimer la TV en direct et la VOD, l’application répond parfaitement aux attentes des utilisateurs modernes. Associée au meilleur abonnement IPTV 4K, elle garantit une expérience de streaming fluide, immersive et durable. Pour ceux qui recherchent une solution IPTV fiable, illimitée et performante, IPTV Smarters Pro représente un choix stratégique et pérenne.